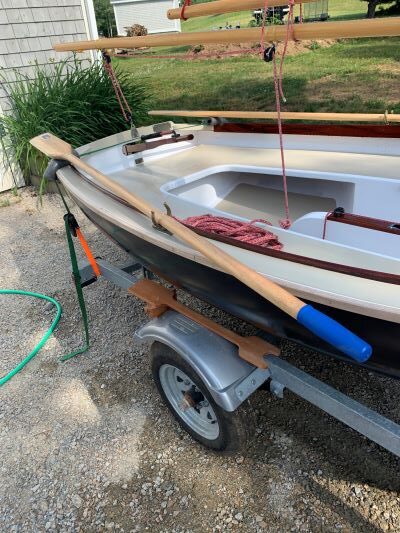
BIG POND 11
HIN: CA- QBP11BP2C020
DESCRIPTION
Hull type: Black round bottom fiberglass hull with transom hung rudder and aluminum centerboard.
Deck and seats: BS 1088 Lloyds certified marine plywood sheathed with 10oz fiberglass cloth set in epoxy resin. Closed cell foam flotation installed under foredeck, port and starboard seats and aft seat.
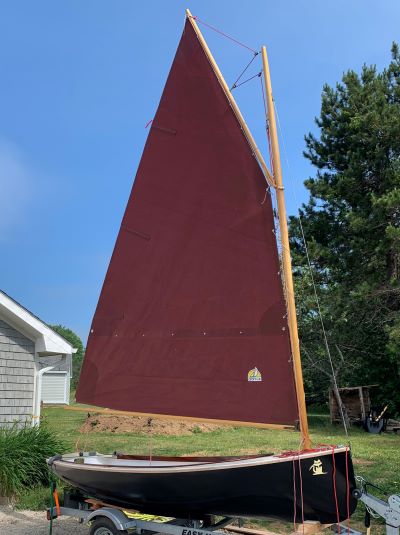
Rig: Gaff rigged catboat. Mast & spars varnished Sitka Spruce.
PARTICULARS
- LOA 11′.0″
- Beam 5″.0″
- Draft (cb up) 9″
- (cb down) 2′.3″
- Weight 160 lbs
- Sail area 80 sq ft
PERFORMANCE
- Suitable for protected waters and fair winds.
- Maximum capacity 4 persons or 600Lbs
- Outboard MAX 3HP 2KW
EQUIPMENT
- Varnished Sitka Mast, Boom & Gaff
- Stainless Steel wire forestay with turnbuckle
- Throat & Peak Halyards with associated Blocks
- Mainsheet with associated blocks
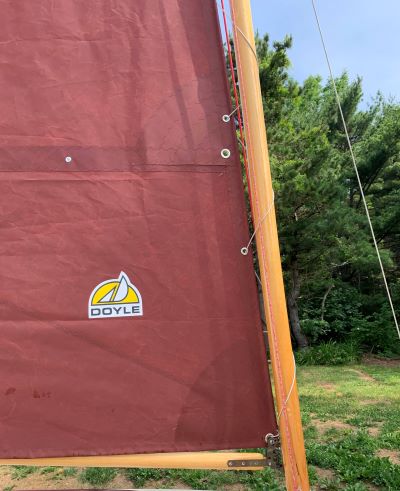
- Doyle Tanbark Sail
- Rudder & varnished tiller
- One pair 7′.0″ varnished Oars
- One pair Bronze Oarlocks
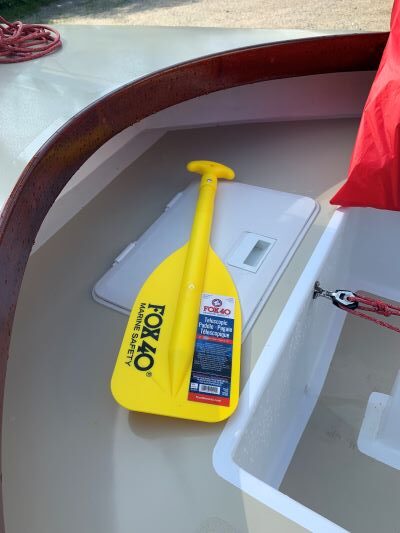
- One Plastic Paddle
How to rig the Big Pond 11
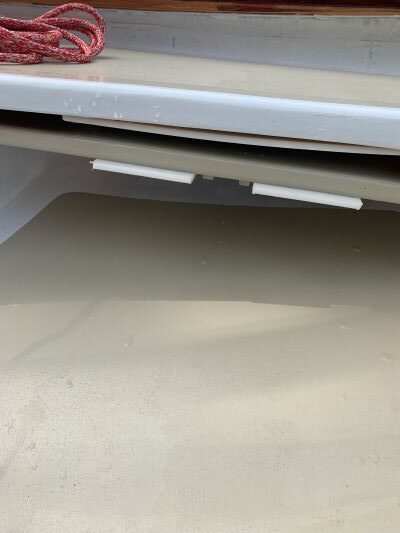
Drain plug
The drain plug must be screwed in before launching. The drain plug shoud be removed if the boat is stored on land or when it is on the trailer.

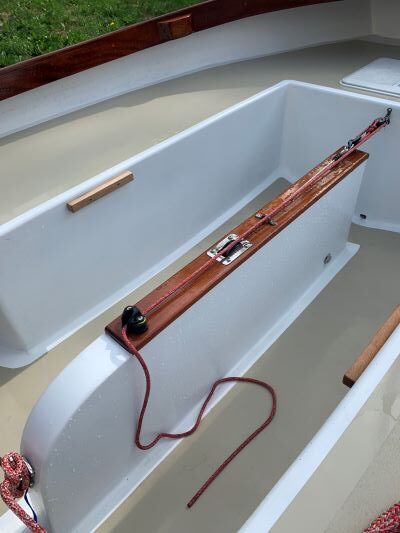
Rowing Seat
The seat is stored under the starboard side seat and secured with a shock cord. The seat fits over the centreboard case and onto the teak support cleats on either side.
Seat stored 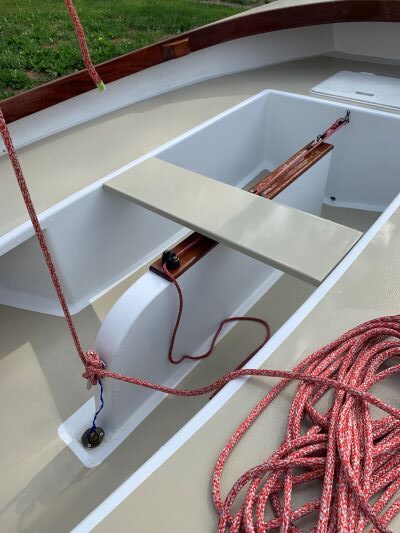
Seat installed
Oars and oarlocks
The boat may be rowed with the centreboard up (works better). Fit the oarlocks into the oarlock sockets. Oarlocks should be removed before sailing.
Forward Locker
The storage locker is accessed from the hatch on the foredeck seat. The collapsible paddle should be stored in the locker along with required safety equipment. (Refer to the Safe Boating Guide)
Rudder:
The rudder pintles fit into the gudgeons on the stern and the tiller is inserted through the tiller aperture and through the tiller straps on the rudder
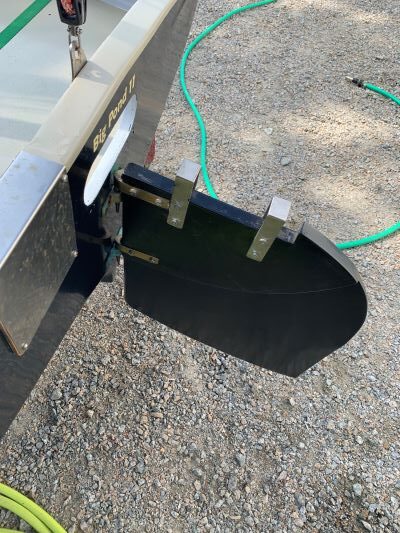
rudder 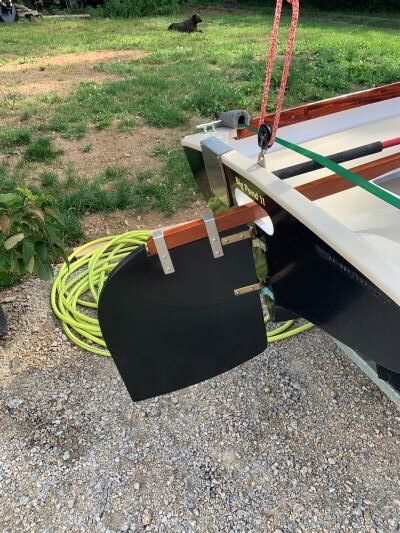
tiller installed 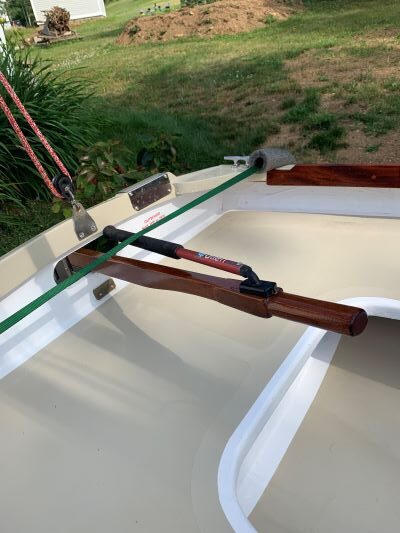
tiller with extension
Centreboard
The centreboard is lowered by releasing the centrboard uphaul from the jam cleat. To pull the centreboard up, pull the uphaul and secure in the jam cleat.
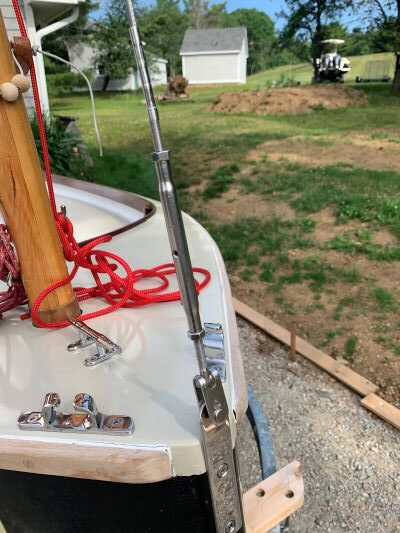
Mast
Lift mast into the mast tube with the forestay on the front. Make sure the mast is seated into slot at the base and unable to rotate Attach the forestay by loosening off the turnbuckle and attaching to the chainplate at the bow of the boat. Tension the turnbuckle and tighten the locking nuts.
Boom
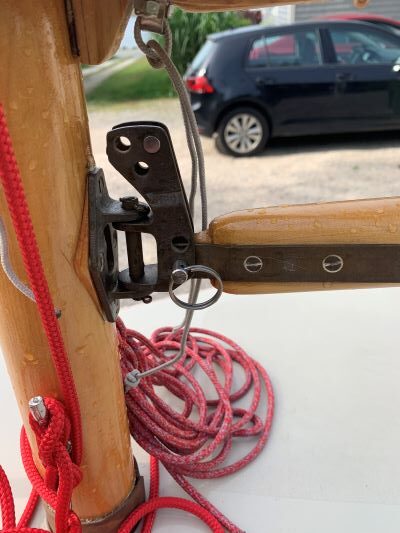
The boom is attached to the mast at the gooseneck. Insert the quick pin through the gooseneck and the boom.
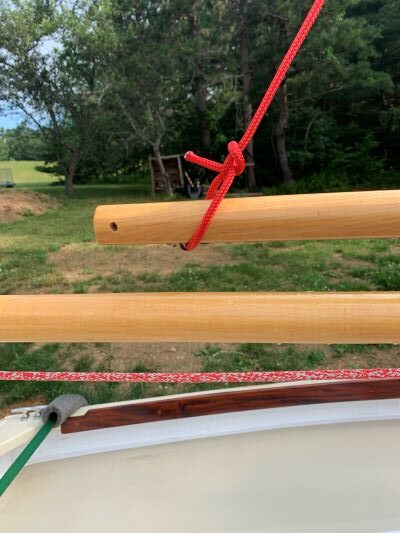
The gaff
The jaws of the gaff are put on the mast above the boom and the parrel beads keep it on the mast. The parrel bead tension is not too tight, start off quite loose so that you can tighten when you feel you have the right fit.

The Throat Hayard
This halyard pulls up the front of the gaff (closest to the mast). It is the red and beige flecked halyard on the starboard side of the mast. Make sure you understand which of the three peices of rope is the halyard tail. the block is shackled to the brass plate that sticks up from the jaws of the gaff. Secure the halyard tail on the mast cleat.
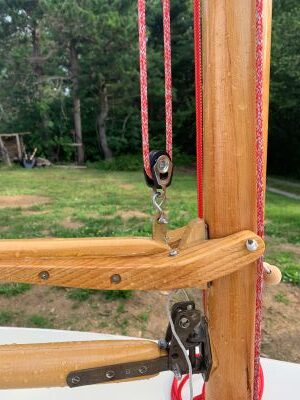
Peak Halyard
The peak halyard is the red halyard on the port side of the mast. There are four sections coming down from the top of the mast. There are two free ends and one block. Look at the top of the mast, the free end coming from the block at the very top of the mast is attached to the end of the gaff, running the end through the bronze saddle and tying a bowline. The block is attached to the saddle on the middle of the gaff, and the other free end is secured to the cleat on the mast. Make sure there are no twists. The gaff is raised by pulling up the halyards simultaneously, approx two hoists on the peak and one of the throat so that the gaff raised horizontally. Practice pulling the gaff halfway up the mast before putting the sail on.
Peak end of peak halyard 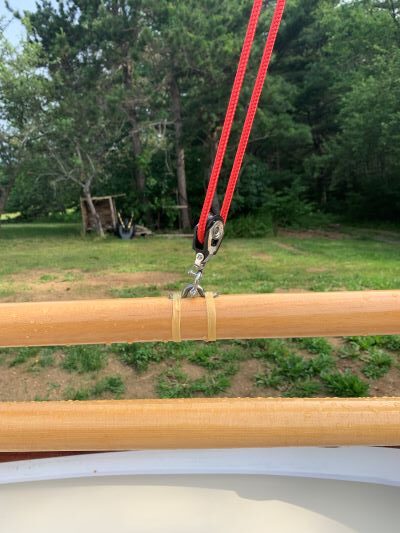
Center of peak halyard
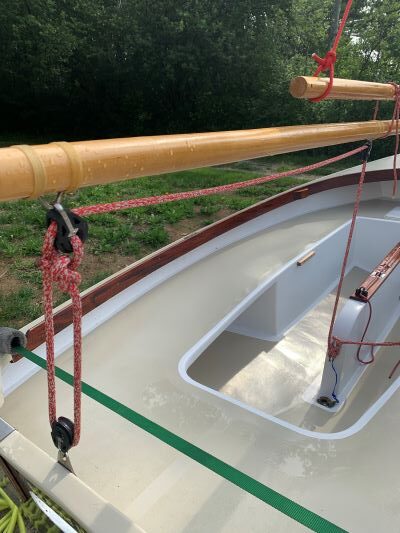
Mainsheet
The mainsheet is a red and beige flecked rope in the sailbag. One end of the mainsheet is secured to the block on the end of the main boom. It runs down to the block mounted on the transom of the boat, up again to the end of the boom then along the boom to the center block and down to the cleat on the end of the centreboard trunk.
Installing the Sail on the gaff
The gaff sail has four corners: The tack, the clew, the throat and the peak. The throat is attached to an eye on the underside of the gaff jaws. Tie tightly. The peak is attached to the end of the gaff . The sail is laced to the gaff using the lacing line. (Please note that all lines are extra long and can be cut to your preferred length)
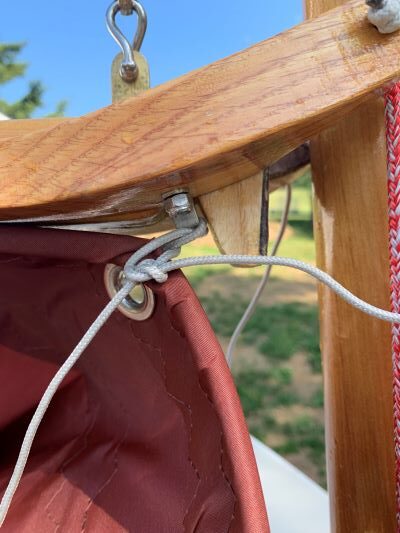
Attach the throat 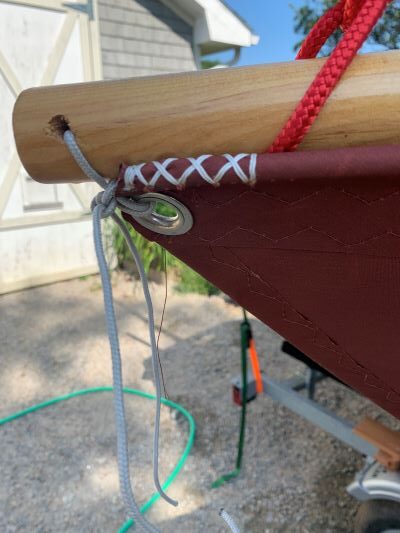
Attach the peak 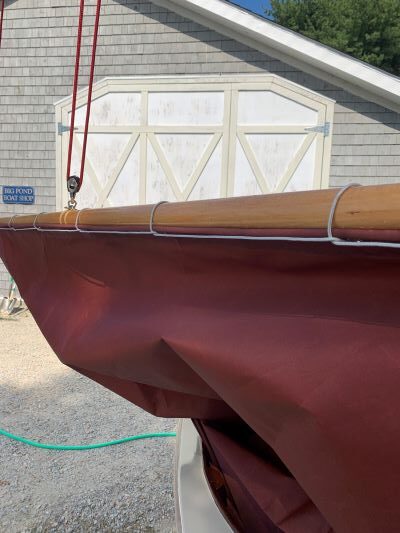
Lace sail to gaff
Installing the sail on the boom
Insert the tack of the sail into the top of the gooseneck and secure with the quick pin. Stretch the bottom of the sail to the end of the boom and tie through the end of the boom.
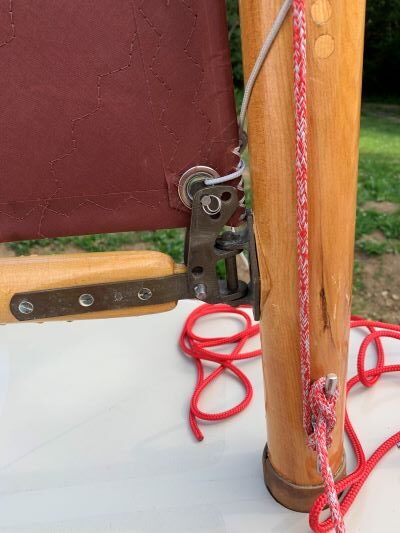
Quick pin through tack of sail 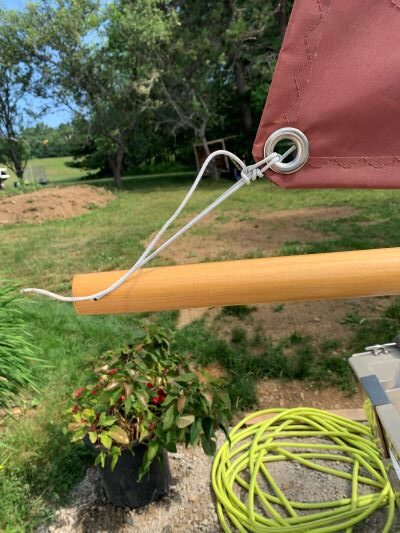
Clew attached to end of boom
Lace the sail to the mast
Using the lacing line, lace the sail to the mast.
Raising the Sail
Raise the sail by pulling up the throat and the peak together so that the gaff raises horizontally. Tension the throat halyard and cleat it, then raise the peak of the sail until there are no creases left in the sail and cleat the peak halyard. Halyard tails should be coiled and stowed inside the boat. For storage, the gaff and boom can be detached from the mast by undoing the mast lacing, undoing the parrel beads and detaching the boom quick pin from the mast.
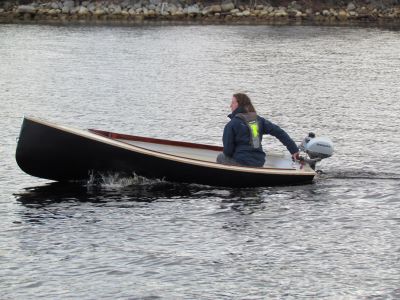
Outboard engine
You can use an outboard engine no larger that 3HP. Attach securely to outboard bracket. Use the outboard without the rudder and tiller.